The best free software for the live broadcast from a computer to Facebook and YouTube.
There are many services allow you to live broadcast video online such as Facebook and YouTube. And also you can live a video to your Facebook account or Page and YouTube with any software that free or paid. You can also use Xsplit to live the video free with essential quality. If you want to live video or record video from your computer screen with the high quality, you can upgrade your Xsplit account.
Why do I suggest you all use Xsplit? Because Xsplit has many functions and very easy to use. You can make a live video with just a few clicks. To live to video the video your Facebook account or page or YouTube and many another service by Xsplit, you may need to install this software first and then you can start live the video as well.

1. Install Xsplit broadcaster software on PC
You can go to xsplit.com to download Xsplit software for free. You can use Xsplit to live video or record video from your computer screen for free with HD video quality and 96Kbs of Audio quality. Moreover, user may also record video with Full HD 1080p, but your video will have Xsplit Logo watermark. And also you will not be able to record a video with the audio quality higher that 96Kbs unless you upgrade your Xsplit account to Personal Pro Plan or Premium plan.
To install Xsplit broadcaster software please following these step below:
1- Go to Xsplit.com and click on download Xsplit broadcaster and save file on your computer.
2- Click on Xpslit broadcaster setup file and follow the instruction on the configuration screen and dialog.
3- After you have installed Xsplit, you may need to sign up a Xsplit account to be able to use this software.
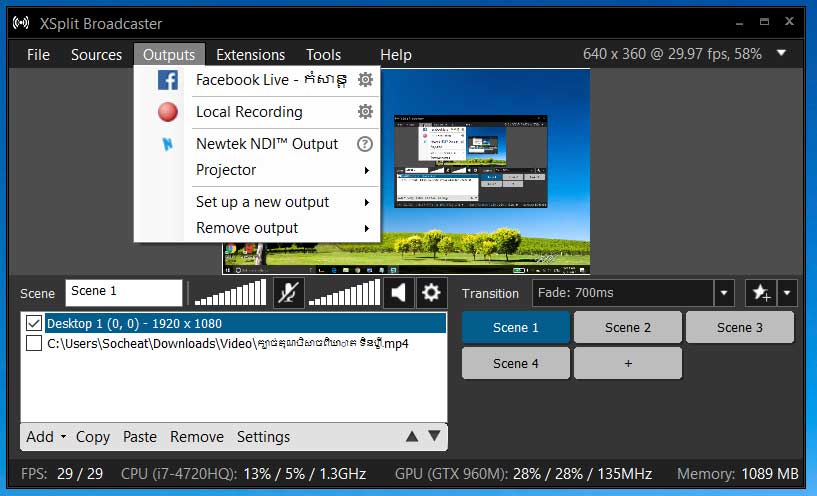
2. How to live video on Facebook or YouTube with Xsplit broadcaster
After you have installed Xsplit broadcaster software, you see much available output option that you can use such live video to Facebook, YouTube, record to the computer, and many another online service.
To live a video to Facebook with Xsplit, please follow the inscription below:
1- Select your media source: From the Xsplit menu bar, please select Source -> Add source. You can choose video source to live it to Facebook or YouTube such as your Computer screen, Video file, Image file, Text , HTML and so on.

2- Select Video quality for your live smearing: At the top right side you will see the live streaming or video record option that you can choose such as Video output resolution, Frame rate per second, Video scale, and snap to grid. You can use the output quality depend on your need or your video source. And also you can add more resolution option if you did not see the size that you want by click on add more resolution option

3- Select the output: To live the video to Facebook or YouTube, please select output with Facebook. and then you will need to authentication with your Facebook account.
After you completed the authentication, you can live to your Facebook personal account or your page by just click. And also you can put post title, description, tag your post very easy just like you are on Facebook as well. You need not find the stream key, server URL with Xsplit to live a video what why I said it very secure broadcast software to use.

Now you can see your live post on your Facebook like the screenshot below.

Thank you so much for visiting my blog. I hope that this article may help you to live a video online easier. Should you have any option, please leave your comment below.